
Here's how I made the zipper flower


I used a 7" black metal zipper and my flower ended up being 2" in diameter. For a bigger flower, you'll want to use two zippers or one longer zipper. All you need is scissors, hot glue gun, and a small piece of coordinating felt.
First snip at the bottom of your zipper, around the end cap, and then cut in between the very first two segments of the zipper.
Separate your the sides of your zipper and take off the zipper "pull" tab.
Take one end of one side and fold over and hot glue in place.
Should look like this. This is will be your Starting Point in a second. Remember that.
Now take the other zipper side and cut off the excess fabric on one side (pictured above on the right)
Then splice the two sides together and hot glue in place. Line up the zipper segments to hide the splice and make sure the spacing is the same. (My dad will be so proud that I used the word "splice":)
Now take your Starting Point and bend around and hot glue in place.

Keep wrapping the zipper around and hot gluing in place until you get to the end. Then glue the end that has extra fabric under the bottom of the flower.

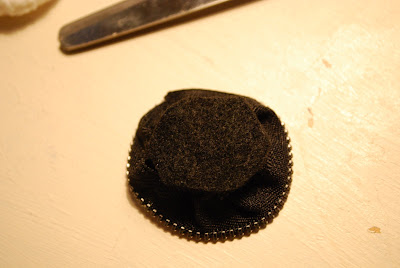
Hot glue a small circle of felt on the bottom.

Add a little bling to the center and you have a rockin Zipper Flower!
Then add your flower to a bracelet, headband, necklace, etc. I put my flower on 3 thin ribbon wrapped bracelets. Pretty stylin, eh?
No comments:
Post a Comment