dearest readers, my show and tell on friday is being postponed until monday...
but do not fret,
nor hang your heads and weep
for monday will be here before we know it
and
do you think i would leave you empty handed today?
for that is not my way.
no, despite Mr Lurgy and his unattractive ways i have for you
a 'happy hanger' how-to...

and just like all my how-tos
it will be a little bit of waffle and then i will leave it up to you to decode my waffle and make it up as you go along.
and i do not have 'step by step' pics because Carlos my camera is feeling a little peaky too.
so let us begin...
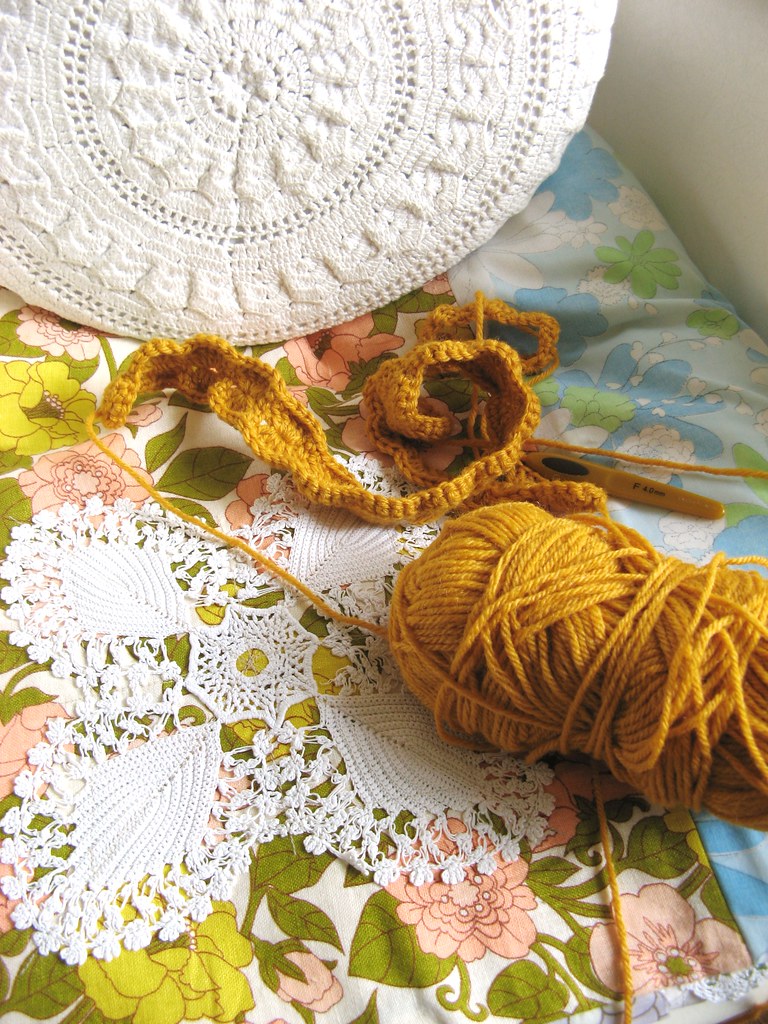
the nitty gritty ingredients required
*one old wood hanger,
mine is narrow in depth only 3/4 of an inch,
* some leftover happy colored yarn, i have used worsted weight yarn
* a Mr Hook, size F, 4.0mm
*i have used double crochet, american terminology
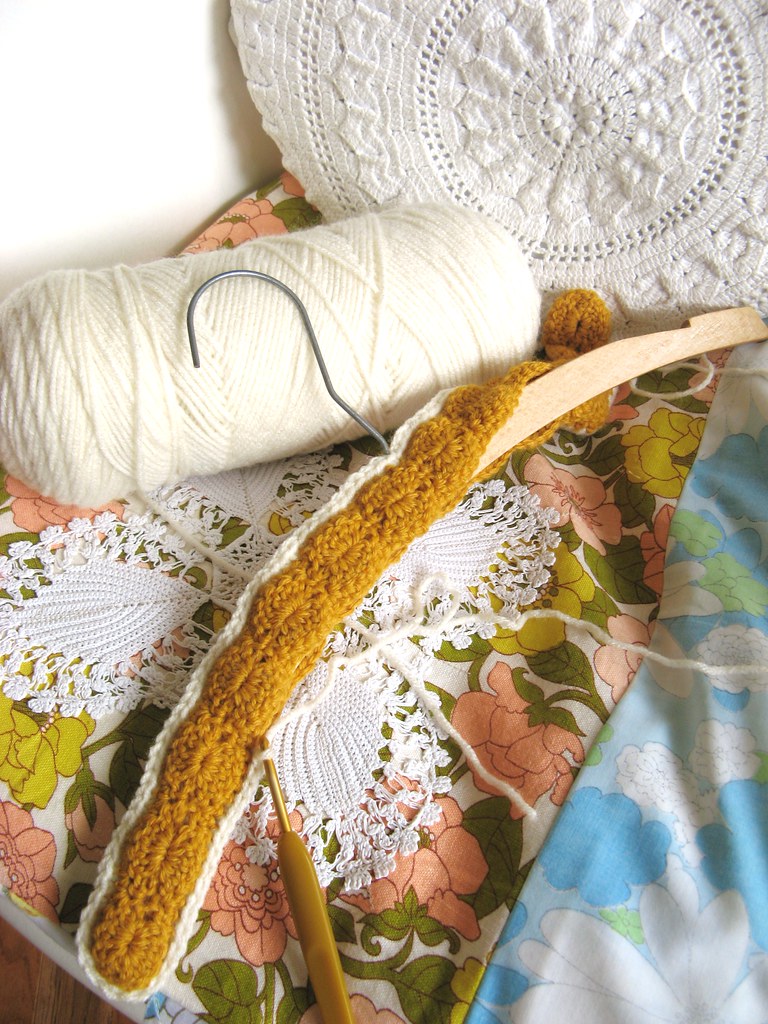
step 1: chain 65, chain 3 (counting as first double crochet) , double crochet into third chain from hook
step 2: double crochet into same chain, repeat two more times.
step 3: single crochet into third chain from your cluster of double crochets.
a shell has been made, next shell will be made up of 5 double crochets, this is the basic shell pattern that can be found in any crocheting how to book.
step 4: repeat all along your chain to end. you should have 13 shells.
step 5: turn your work but keeping the same side facing you and repeat the same row you just did, but along the bottom side of the chain.
a mirror image of what you have just done.
(lordy i hope this all makes sense)
step 6: finish off your final shell by slip stitching into the very first shell you made.
basically you have gone around in a circle. you first side is complete, 13 full round shells should be in your hand.
step 7: repeat all of the above for your second side of your happy coat
step 8: weave in your ends
step 9: place your two pieces right sides together
i chose to do this because i liked the wrong side of my crocheting best, you can chose to use the other side if you wish.
with a contrasting yarn color, begin the right end of your happy coat, making sure the stitches are lined up and start single crocheting them together.
i went though both loops of the stitch below.
step 10: when you get to the left end of you happy coat, pop your hanger in place, then continue to single crochet around the bottom of your happy hanger coat.
this is a bit fiddly and so you may have to take a breather every now and then...
step 11: when you get all the way around your happy hanger, finish off and weave in your last thread.
step 12: hang your happy hanger up for all to see,
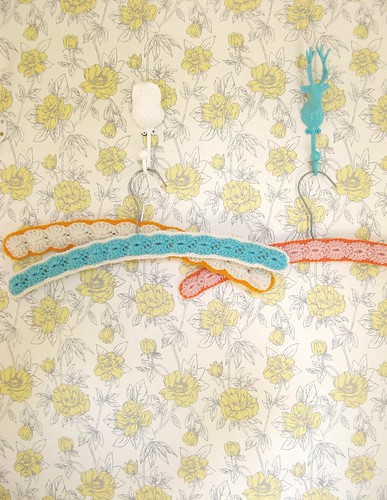
make sure any passing strangers who come into your dwelling notice your happy hanger, taking time to admire your happy hanger handy work and perhaps cast an envious eye upon your happy hanger and your Mr Hook.

step 13: continue making more happy hangers, loving them all equally
and that's it! easy peasy except for my ability to make it super complicated with a lot of waffle... if you know how to shell crochet then you can make this happy hanger coat and spend the rest of your days addicted to filling your life with happy hangers...
No comments:
Post a Comment