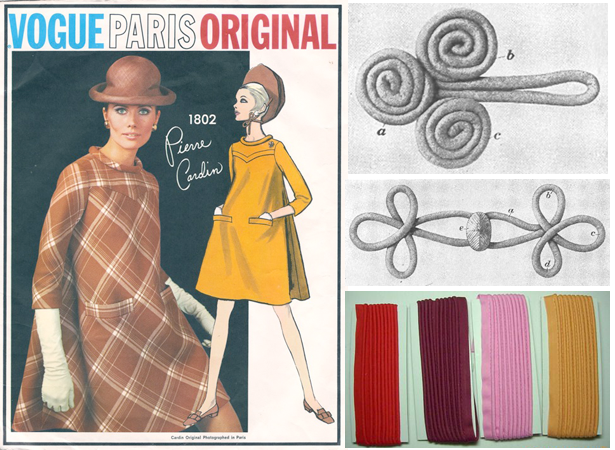
Cording – cord wrapped in fabric that’s been cut on the bias – is an ancient embellishment that packs as much punch today as it did in the 1730’s or the 1940’s. Whether you use it to make appliqued motifs, corded pin tucks, frogs, spaghetti straps or piping, cording is one of the most versatile weapons in your sewing arsenal. Still not sure how to use it? Well, as with everything sewing, there is a lil’ trick to it. I’ll show you how!
First, you need to decide whether you are making piping or true cording. For piping and corded pin tucks, you’ll want cotton cording on the inside for fluffiness factor. For true cording, I recommend rattail. It has a funny name, but this shiny 100% rayon cord has a better glide to it than cotton cording, a major factor when you are turning the bias covering right side out.
Let’s talk about piping first. Piping is super easy to make. Cut bias strips wide enough to accommodate your seam allowance (times two) and your cording. Install a zipper foot (or piping foot if you have one). Fold the bias strip over the cording with raw edges matching, force the cording into the fold and stitch as close to the cording as you can.

True cording is a tiny bit trickier because the seam allowance needs to be hidden inside along with the interior cording. You could just fold the seam allowance back and hand sew it on there right side out with tiny stitches but – my gosh – who has the patience these days? Here’s another way: cut a length of rattail two times the size of your desired finished length of cording. Find the center. At the center, tack one end of your rattail to the right side of the fabric. Now, fold the bias strip in half over one side of the rattail, right sides facing with raw edges matching. (This side will not fill your finished cording – it’s just acting as a turning “handle.”) Sew along the strip as close to the cording as you can with a zipper foot or cording foot. When you’re done, pull the encased (“handle”) half of the cord out of the casing as you push the casing down over the un-encased half of the cord. Keep doing this until the whole casing is right side out. Cut the un-encased “handle” side off.


First, you need to decide whether you are making piping or true cording. For piping and corded pin tucks, you’ll want cotton cording on the inside for fluffiness factor. For true cording, I recommend rattail. It has a funny name, but this shiny 100% rayon cord has a better glide to it than cotton cording, a major factor when you are turning the bias covering right side out.
Let’s talk about piping first. Piping is super easy to make. Cut bias strips wide enough to accommodate your seam allowance (times two) and your cording. Install a zipper foot (or piping foot if you have one). Fold the bias strip over the cording with raw edges matching, force the cording into the fold and stitch as close to the cording as you can.

True cording is a tiny bit trickier because the seam allowance needs to be hidden inside along with the interior cording. You could just fold the seam allowance back and hand sew it on there right side out with tiny stitches but – my gosh – who has the patience these days? Here’s another way: cut a length of rattail two times the size of your desired finished length of cording. Find the center. At the center, tack one end of your rattail to the right side of the fabric. Now, fold the bias strip in half over one side of the rattail, right sides facing with raw edges matching. (This side will not fill your finished cording – it’s just acting as a turning “handle.”) Sew along the strip as close to the cording as you can with a zipper foot or cording foot. When you’re done, pull the encased (“handle”) half of the cord out of the casing as you push the casing down over the un-encased half of the cord. Keep doing this until the whole casing is right side out. Cut the un-encased “handle” side off.


Voila – cording! Now you’re ready to applique that sucker down. Just use tiny stitches hidden underneath the cording and a matching thread and you’re good to go!
No comments:
Post a Comment